
How To Create A YouTube Video
Videos are everywhere online these days. Many people create all kinds of videos from their family life, to moments that they’re on vacation, to even scary moments like encountering wildlife that might seem like they’re going to attack. A lot of times though people want to create videos that will propel them to fandom or videos that will help people. This is why I want to show people how to create a YouTube Video.
It may sound scary to some and you might feel like you have to buy expensive cameras and other fancy equipment, but I can assure you that you really don’t need all of that. If you’ve got a smartphone, you’ve got the basics and can start making videos immediately. If you don’t feel like using your cellphone there are other options that are inexpensive and I’ll go over those today. Now it’s time to see how I or anyone can create a YouTube video.
Create A YouTube Channel
YouTube is one of the biggest created video platforms out there and with good reason and they are also now owned by Google. If you’ve ever wanted to create your own videos and share them with others on YouTube, you can easily get started today. The first thing you want to do is create a YouTube channel and you can easily do that with just your own personal account at YouTube.
If you don’t have a YouTube account, it’s really easy to create one. You just click the Create Account button and go through the steps Google needs for account creation and you should be all set. Once you’ve got your account set up, you’re pretty much ready to go. The nice thing about YouTube is that you can have multiple accounts or channels so if you want to have your main account just for watching videos and another for purposes of uploading videos that you’ve created, you can definitely do that.
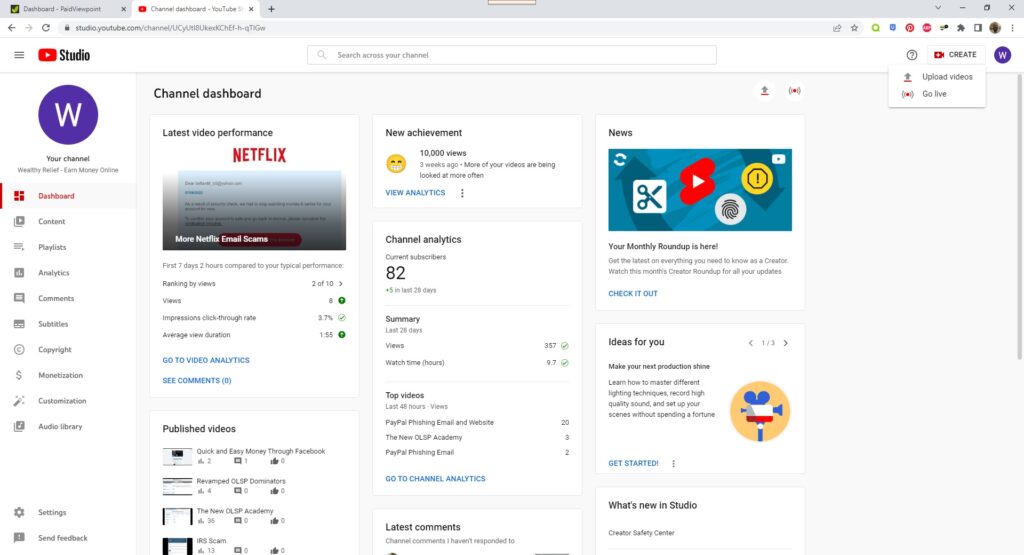
Once your account is created you can choose a name for your account or channel and there will be an icon on the top right of the screen that you can click on which will bring up a menu of options that give you the ability to switch accounts, accessing what’s called the YouTube Studio and more. You’ll also notice that to the left of your icon for your channel is another icon that is in the shape of camera along with a plus symbol in the middle of it.
You’ll click that icon to begin the process of uploading a video to your YouTube channel. It’s a fairly easy process to upload a video to your YouTube channel, but there are definitely certain things you’ll want to make sure your video adheres to before it is uploaded otherwise it could potentially get flagged by YouTube and it is up to them to choose the consequences if that happens. We’ll definitely go over that a little bit later, but I want to talk about options you have for recording a video.
Options for Recording a Video
I did mention earlier that if you have a smartphone, you can start making videos immediately and a lot of people do that these days especially to make videos for another popular video platform called TikTok. I have not personally created videos for that platform at this time, but that is definitely one of my future goals.
Not everyone wants to use their cellphone for video recording and that’s absolutely fine. You have other options and they are not expensive. If you use a desktop or a laptop you can use a web camera which some of them come equipped with. I have one laptop that has one built in, but I don’t use my laptop for that purpose and until very recently, I’ve opted not to use a web cam as you could say I’m camera shy, but I’m ready to get out of my comfort zone and change that.
You might be asking yourself then how in the world do I create videos if I don’t film myself either through my smartphone or web cameras? The answer to that is simple, I use a program that records my computer screen and I’ve got a microphone attached to my desktop so that you can hear me during the recording of my screen.
I do it this way because of the content that I want to share with others such as legitimate ways to make money online and how to avoid nasty email scams that scammers send out to people. So for that purpose, it’s essential that I record my screen to show people the scams that are out there that I’ve personally received or the programs I use to make some money online.
This leads me to my next topic, of whether you should record a screen or yourself? I’ve already started talking about how I create videos and how that is also starting to change, but which one is best for you should you decide to start creating videos?
Record a Screen or Yourself?
In the beginning when I first decided that I wanted to create videos, I definitely was not ready to get my face out there and was unsure if there was a way to create videos without showcasing myself. Well lo and behold through some training of a make money online program, I found out that there is software out there where I didn’t have to show my face on camera. I was relieved at that and eager to start creating videos while also using my microphone so people could hear me talking about what I’m showing on screen.
The program I use is called Screencast-o-matic and it is very inexpensive to sign up and start using. I pay $19.00 a year to use it and it has been very good for me. Their software also allows me to make use of a web camera when I’m ready and they even have ways to use a mobile device should you choose to go that route.
At the time when I first tried out Screencast-o-matic, there was a free trial period, but not sure if they still do that. For $19.99 a year though it is well worth the price. If you decided to go with that membership level, you’ll be able to download the software onto your desktop or laptop (download the app for smartphones) and start using it immediately.
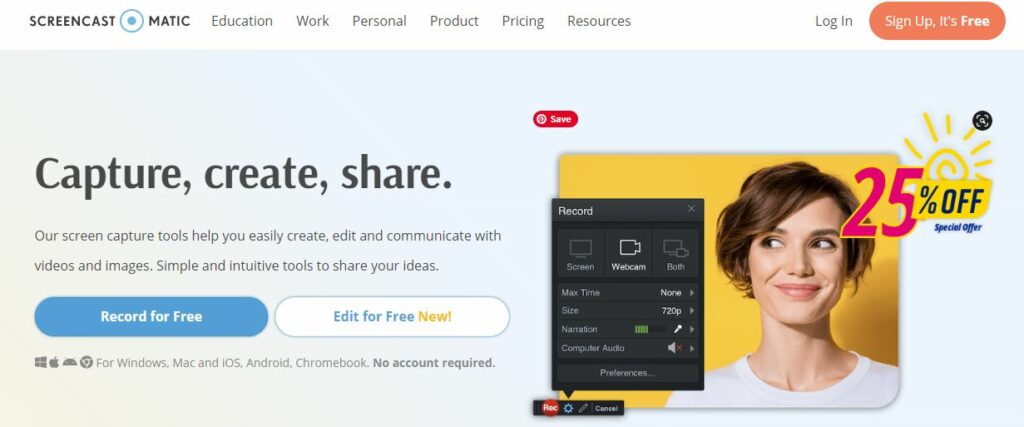
When you’re ready to a record a video, a small interface will pop up as well as a border section on your screen that you can always resize. The section within the border is what will be recorded from your computer screen. Now before you start recording, you can make sure that any microphone you have, does actually work as well as any web camera that you may have.
Once you’re ready to record, you’ll hit the red record button and then a small countdown will start (3, 2, 1) and then you are good to go. Don’t worry, if you don’t like how you’ve’ve started the video or how it’s going after a few minutes, you can stop and immediately discard the video and start over. Trust me, I’ve done this numerous times. There’s no limit to how many times you can do that.
After you’re done recording what you want, hit the pause button and then click the Done button and then a menu will pop up that says Save/Upload, Quick Share and Edit Video. I’ve only ever clicked the Save/Upload button as I’m usually just ready to name the video file and save it to my file of videos. I’ve never used the Edit Video feature, but I have taken a look at it and it does have some nice features that you can use to change certain aspects of the video you just recorded.
Now what I’ve talked about is just how I do videos and the software I use for it. There are tons of video recording programs out there and your phone can be used for that purpose as well as there are lots of video recording apps out there that you can download as well.
Just doing a screen recording along with speaking in the video with my microphone has worked well for me and could very well work for you as well if you’re not ready to put yourself in front of the camera. You don’t have to follow my route though and you might want to go through a different angle for whatever audience you’re targeting. Whatever your preference, it will work with Screencast-o-matic. Ok, now that the video has been created or edited to your liking, it’s time to upload the video to YouTube and share it with others which is what I’ll talk about next.
Share your YouTube Video
Alright, you’ve got your video all recorded and edited just the way you like it and so now you’re ready to upload it to your YouTube channel. It’s a very easy process to upload a video to YouTube, but one thing I do want to mention is that YouTube will check your video for any copyright issues which could be as simple as having a song on your video from Aerosmith as an example. I had that happen once as I was showing a video of one of the survey sites I use and the survey I was doing happened to feature a commercial in it that used a song by Aerosmith. YouTube informed me that it was a copyright violation and they silenced the song from my video.
One thing that I forgot to mention is that when you choose to upload a video to YouTube, you’ll immediately have two options. You can either just upload a video or you can go live. I’ve never used the live feature before, but I’ve seen other YouTubers who have and I think it’s pretty neat as you can immediately have people watching you live and you can have a chat going at the same time with other video watchers chatting about your live video.
Getting back to uploading a video, you’ll want to select the video file of the video you intend to upload and click next. You’ll immediately have a number of options for the video such as making it public or private, if it’s appropriate for kids or not, and then you’ll able to add a description of the video which can include any links you might want your watchers to click on.
Once the video is uploaded, you’ll be able to either choose a thumbnail picture from the video itself or upload one of your own and then the video should be fully processed and ready to go on your channel. You’ll immediately be given the url to the video which you can copy and share to other places such as maybe your own website where you can embed it into a post or share it to social media and that’s all you have to do to share your YouTube video once it’s uploaded to your channel.
Creating a Video is Easy these days
As you can see, it’s not really hard to create a video and it’s really easy to do these days. I highly recommend creating videos if you’re running an online business that way you can give your audience a visual representation of what you’re promoting as well as helping them to gain trust that what you’re showing them will help them with whatever problem or issue they could be having.
Now that you know about how to create a YouTube video, you can definitely do it yourself and I’ve shown you how I go about doing it. The way I do it may not be what you want to go for in creating videos and that’s perfectly fine as you definitely have options.
Again, you can use your smartphone or Screencast-o-matic or any other video recording software that you may feel works for you. You can easily create a YouTube channel as a hub for your videos so that people who are interested in what you have to share with them can watch them over and over again or watch any new content that you add to your channel. If you get enough views and subscribers you can actually start to earn money through YouTube and there are many people who have done that.
If you’re running an online business and you want to keep attracting new subscribers, then you want to keep making video content as consistently as possible as the more you add to your channel, the more people are going to continuously like what you are offering and soon you’ll have a nice following of people.
There are many reasons people create videos, but if you want to learn how to do that as part of an online business you’d like to pursue, Wealthy Affiliate does teach you to do just that and how to use videos as part of it. If you’ve never heard of Wealthy Affiliate before, you can read my review of it by clicking here.