
Case Study: Website Creator Tools Through HUBS
Welcome back and it’s time to move forward with my case study of creating an affiliate marketing website from scratch through Wealthy Affiliate and here I will be talking about the use of website creator tools through the HUBS platform. If you don’t know what HUBS is, you can check out my previous post where I take a look at some of the main aspects of the new HUBS platform within Wealthy Affiliate.
In this post, I’m going to be moving forward with my case study and I will be creating a new HUBS section for the website that I’ll be using, choosing a niche which is actually already done, but I do want to talk about that process again here, choosing a theme, website creator tools that I’ll be using going forward and the sky’s the limit once you start getting all these things set up in HUBS for your affiliate marketing business. I will also have a video at the end of the post and posted on my YouTube channel, Wealthy Relief, showing exactly the process of setting up a new HUBS section for an online business.
Creating a New HUB
The HUBS platform is now the bread and butter of Wealthy Affiliate and it is an amazing section that they’ve added in. This is the main platform for your affiliate marketing business and the way it’s set up will ensure your success, provided you remain consistent with your business and put into practice what is taught in the core training that is within HUBS.
Now, in order to get started with the HUBS platform, you’ll want to go to the top of the page and to the right of Wealthy Affiliate icon, you’ll see a clickable icon that is titled Hubs. You’ll click on that and once you do, you’ll be taken to a section within the new platform that will show you which websites you’ve already put into HUBS or you’ll have the option of creating a new HUB (you can have up to 3 different HUBS within Wealthy Affiliate as a premium member and I believe a few more if you’re premium plus).

All you have to do to create a new HUB is click the blue Create a Hub button which will be to the left of everything. After that’s done, you’ll be taken to a new page welcoming you to HUBS within Wealthy Affiliate and it shows you six steps to go through to create a brand new HUB which is pretty easy. Once you read the welcoming message, you’ll want to click the blue continue here button that will bring you to a section where you can choose creation of a new hub with a new website or an existing website. For this case study, I went with an existing website, though it’s definitely not ready for traffic yet and is only a shell.
Moving on from there, the section is titled “How Do You Want To Make Money?”. Here, you choose building an affiliate marketing business around a niche of your choice or promoting Wealthy Affiliate. Either one is a good choice, however, in my opinion, I believe you should choose a niche you’re interested in because once you build a business around that, follow the training, gain traction and start to earn revenue, you’ll be in a better position to promote Wealthy Affiliate later on because you’ll see first hand that what is taught here really works. You’ll be able to show people how successful you are with your own personal niche website.
The next section (should you decide to go with a niche instead of promoting WA), is choosing your niche. Sometimes this can be a challenge as you want to find something that you feel you have some knowledge in, but also will be a profitable one for you. The good news is that Wealthy Affiliate uses the power of AI here to help you find a niche that can be a good fit for you and can even break it down into a sub-niche for you that would be more targeted, say for example you choose the diet niche. Diet is so broad so you might break that down and choose a more specific type of diet to target like the Keto diet for example. The AI platform here will break it down even more into other ideas and further niches you can explore. It really is a handy tool.

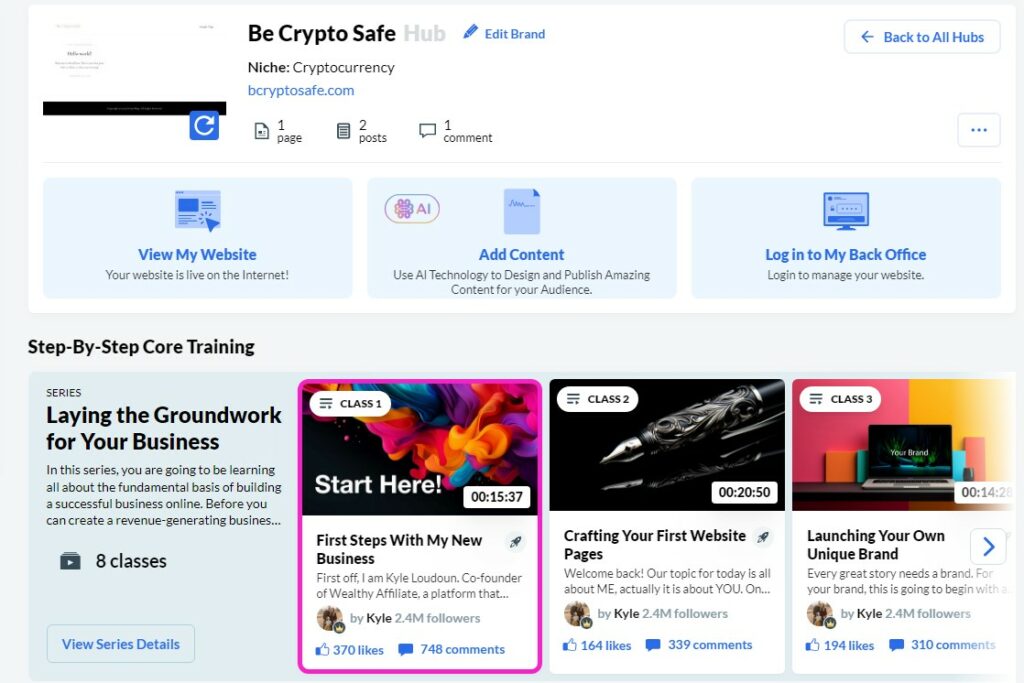
Next up we have choose your business brand which allows you to give a name you want your business to be recognized as. For example, my url is bcryptosafe.com, but my brand name will be called Be Crypto Safe which will encompass key areas of cryptocurrency that people are interested in and how to keep your crypto investments safe.
Last, but not least we have the last step and this one will be a continuous one, where you’ll build your website and go live with it, meaning publish your website and then add content as time goes on. This is where you’ll use the website creator tools through HUBS to keep adding content through your website. You’ll be using the content writing tool as well as the AI tool to help you write content even faster. Once you’re done with content creation, you’ll publish it and then can make changes in the back office through the use of the WordPress Editor which will be explained in the training.
Tasks and Goals
Tasks and Goals are a new section that was just added to the new core training within HUBS and I think it’s a fantastic idea. This will help you stay on track with building your online business and you’ll have a monetary goal to reach for. I think that this is essential as you’ll be able to see your progression as you go through the training and implement what is taught and you’ll see that you are making progress.
The task and goal section is just right underneath the core training and one of the first things that you’ll notice is that there is a spot to put what your monthly revenue goal is. I believe this is very important because it gives you a dollar amount to strive for. For my case study, I put $4,000 a month of revenue and will work to make that a reality and beyond as you can always scale up your business.

Once you put in your monthly revenue goal, it’s time to move to the tasks to be completed as you go through the training. The first three tasks are pretty simple, but that will at least get you started on task completion. Those three comprise of choosing a niche, brand idea, and build a website. Now when you build a website, it’s just the shell of a website, you have to add the main features of it which will be taught to you from the training. You’ll be adding the first couple of pages to your website that are in the first section of the training.
Moving on from there, there are other tasks such as watching the first training intro video, the about me page, the privacy policy page, registering a domain, adding a logo, setting up SEO and many more tasks. These tasks are achievable to complete and you’ll see how easy it is to complete as you progress along with your business from you what you learn in the courses. I’m very happy that Kyle and Carson created these tasks which I think are better than what came before and it’ll show you true progression with your affiliate marketing business.
Choosing a Theme
Choosing a theme for your website is important and there are many kinds of themes you can choose from. I know I’ve talked about this before, but when you pick a theme, it’s going to show your traffic the overall look of your website. There really is no right or wrong answer, but you should choose one that will generally fit for the type of look you are going for with your website. I’ve already chosen a theme for the website I’m using in the case study, it’s just that I now need to build out my website in order to give the look to theme I’ve chosen.
Don’t worry, as I’ve mentioned in the past, you can always change your theme later on down the road if you want to update the look of your website. Keep in mind though, that if you choose to do that, certain aspects of your website may look noticeably different or won’t look right so you may have to tweak things here and there if you go to a different theme.

Since Wealthy Affiliate uses the WordPress website editor, you’ll be able to see all the different kinds of themes you can choose from and how you can also change different settings within the theme as you build out your website. The good news with a lot of the themes is that they tend to get updated a lot with new features and security measures and so when those become available, you’ll definitely want to make sure you update them.
Other then that, there’s really not too much else when it comes to themes. You just want to choose one that seems like it would be a good fit for the type of look you are going for with your website and niche and go from there. If you ever have any problems you can always reach out to site support here within Wealthy Affiliate and they will definitely point you in the right direction or fix the issue if they’re able to. You should never feel like you’re alone or don’t know where to turn if you start to have issues with your website as you can always ask questions here and the community here will usually help you out.
Website Creator Tools You’ll Use Going Forward
Once you get all the initial things set up with your website such as choosing a niche, registering a domain name, setting up a brand name for your site, transform the shell of your website and start adding your first couple of pages (which are the about me and privacy policy pages), you’ll be using a certain set of website creator tools going forward as you continuously build out your site.
You’ll be adding a lot of blog posts going forward using the site content writing platform and then you can assign some of those blog posts to various pages of topics within your niche that you would have created. The site content writing platform has changed a little since the massive HUBS update had been added to Wealthy Affiliate as I remember that there used to be a great spell check tool within it, but it appears to have been removed. Nevertheless, it still is a great writing platform to create content if you don’t prefer to use the AI tools for content creation.

With that being said, the AI tool is the next creator tool here and it dramatically cuts down the time it takes to create a blog post though with the use of that AI tool you will have limited use of it as you do have a word balance you are allotted each month as a premium and premium plus member. Since I’m a premium member, my current monthly allotment is around 7,000 to 8,500 words a month. Those amount of words can probably get you around 4 to 5 great quality articles each month depending on their length. If you ever want yo add more to your word balance, there is an option to buy more word credits, but that is certainly up to you and you are not required to do so.
When using the article designer (the AI tool), you just have to input a few things in order to get an article generated by AI and they are as follows: type of content, article topic which is usually the keyword you are focusing on, adding additional details about the topic (not required, but is very helpful of getting the AI generated article more to your liking or what you’re going for with the post), and finally, choosing the article length that will break it up into different sections of the blog or page post. Once all of that is put in, you’ll then click the blue button that says create content outline (doing that will also cost 100 word AI credits) and it will take a couple of minutes or so to come up with an article based on what you put in for the type of content you want the AI article to focus on. It’s very important to go over the article outline that the AI generated and see if it’s to your liking and you can always take away from it and add stuff to your liking which is generally what you want to do.
The Sky’s The Limit
What I have talked about in regard to the website creator tools through HUBS is how you’re going to be successful with content creation for your website. You’ll always have access to these wonderful tools as well as your back office area which is the WordPress editor where you can make even more changes to your website such as changing the settings as well as adding different plugins that do different things for your site. A word of caution though, you don’t want to use too many plugins as that can actually cause your site to slow down.
There are a few plugins that will automatically be loaded onto your site when you first create it and the training tells you exactly what they are, their function, and how to activate them. These are the core plugins you’re gonna need in order to have your website easily recognised by Google and will help get your content indexed and ranked faster on the search engines which is exactly what you want.
After you get past the first part of the training and check off the tasks along the way, you’re going to be using the website creator tools going forward as you advance your website through content creation. The sky is the limit here as you have two options on how you can create the content. You can use the AI content tool or you can create a post freely yourself through the main site content writing platform. I tend to use the writing platform as that is what I’m used to doing especially since I’ve been here at Wealthy Affiliate for quite some time and have used it under the old core training.
Going forward from here, I’ll be continuing on with my case study where I’m going to start adding the first web pages to my niche site, building my brand image, and will soon start adding blog posts to the website. You’ll definitely want to check out my YouTube channel where you’ll be able to see it visually as I progress through building an affiliate marketing business from scratch. As you’ll see through out the time I build out my site, the sky is the limit as my content will grow through keyword research and rankings of my content through the search engines. Stay tuned folks, it’s an exciting time!